
(items in this blog were provided for the purposes of review)

The main focal point of my living room has always been my fireplace. There is an old chimney breast behind it which is closed off so this is now a wooden decorative mantle with an electric fire. I’ve changed my mind about what I wanted to do in this space multiple times, as it’s so hard to make a decision when nothing in the room “matches” but I’m finally happy.

SFirst things first I painted the entire unit green – the shade is “wise old sage” from the Frenchic range. I had a sample pot I was originally going to use for something else but one afternoon I just decided to go for it but I felt it was just too plain. I do love this colour and so I ended up painting my kitchen cupboards – but that’s another story.

I love colour so propped up a painting behind the fire place but this didn’t really work, as we headed towards autumn the colours were too vibrant and I eventually took this down before I dressed the fireplace for Christmas. I finally replaced the electric fire in the Black Friday sales with a £50 bargain find from B&Q. It was around this time I also gilded the mirror.

So Christmas came and went, during December I just loved the way this looked – but as I took down the decorations in January I decided to re-think this space again. After our experience with the kitchen floor tiles being so chaotic and messy I thought that my dream of a tiled fireplace was out of the question but I managed to find an alternative with vinyl. Yes that’s right – my new fireplace tiles are stuck on!

I don’t know why I hadn’t thought of this idea before – I covered the kitchen work tops in vinyl and I run a small business making vinyl cut designs so it seemed like the obvious answer – I measured up the fireplace and the base board and ordered enough to cover it with a bit extra for pattern matching, cutting in and overlaps. This is important because when you’re cutting around corners you do need extra to work with. My vinyl arrived in a huge tube delivered by courier – rolled up tightly and packed to protect it – with extra tissue at each end which was a clever touch to prevent crumples.

The back of the surround was easy to plan as it’s a simple rectangle with square corners and straight edges. I unrolled the vinyl and cut it to size, surprised with the thickness and overall quality as previous brands I’ve used have been extremely thin. To prepare the surface I used an anti bac spray to clean and then thoroughly dried it – then it’s simply a case of applying the vinyl as if it’s a sticker. I used a plastic bank card to smooth it down.

The painted surface I was applying the vinyl to showed the texture of the wood grain, but this wasn’t at all visible through the vinyl because it’s thicker than most I’ve experienced before – the adhesive is strong but not impossible to manipulate, I had to adjust and reposition it a couple of times to ensure it was straight and this didn’t cause me any challenges, smoothing nicely in to place with very few air bubbles.

I used a ruler and a blade to trim the excess from the bottom (I’ve re applied these off cuts to the backing paper to save for a rainy day project). The base board required a little bit more planning because firstly I wanted to match up the pattern and secondly I had some awkward moulding to cut around. This is where it’s handy to order a little extra than you need for your project.

Cutting in can appear like a challenge at first – you can practice with paper and make a template if you aren’t sure. I stuck down the vinyl from the front of the base board exactly as I wanted it to lay and then I trimmed small sections off with vertical lines marked using a pencil and ruler and cutting in to the vinyl with my scalpel – then smoothing these in to the moulding with my plastic card and trimming the excess away neatly along the horizontal with a scalpel.

Once it was all in place I stood back to admire my handiwork – the entire process took twenty minutes and that’s with me pausing to take pictures throughout for this blog. The best thing about this vinyl is that it doesn’t damage the surface it’s applied to, so if I change my mind I can replace it – and re-use the vinyl elsewhere.
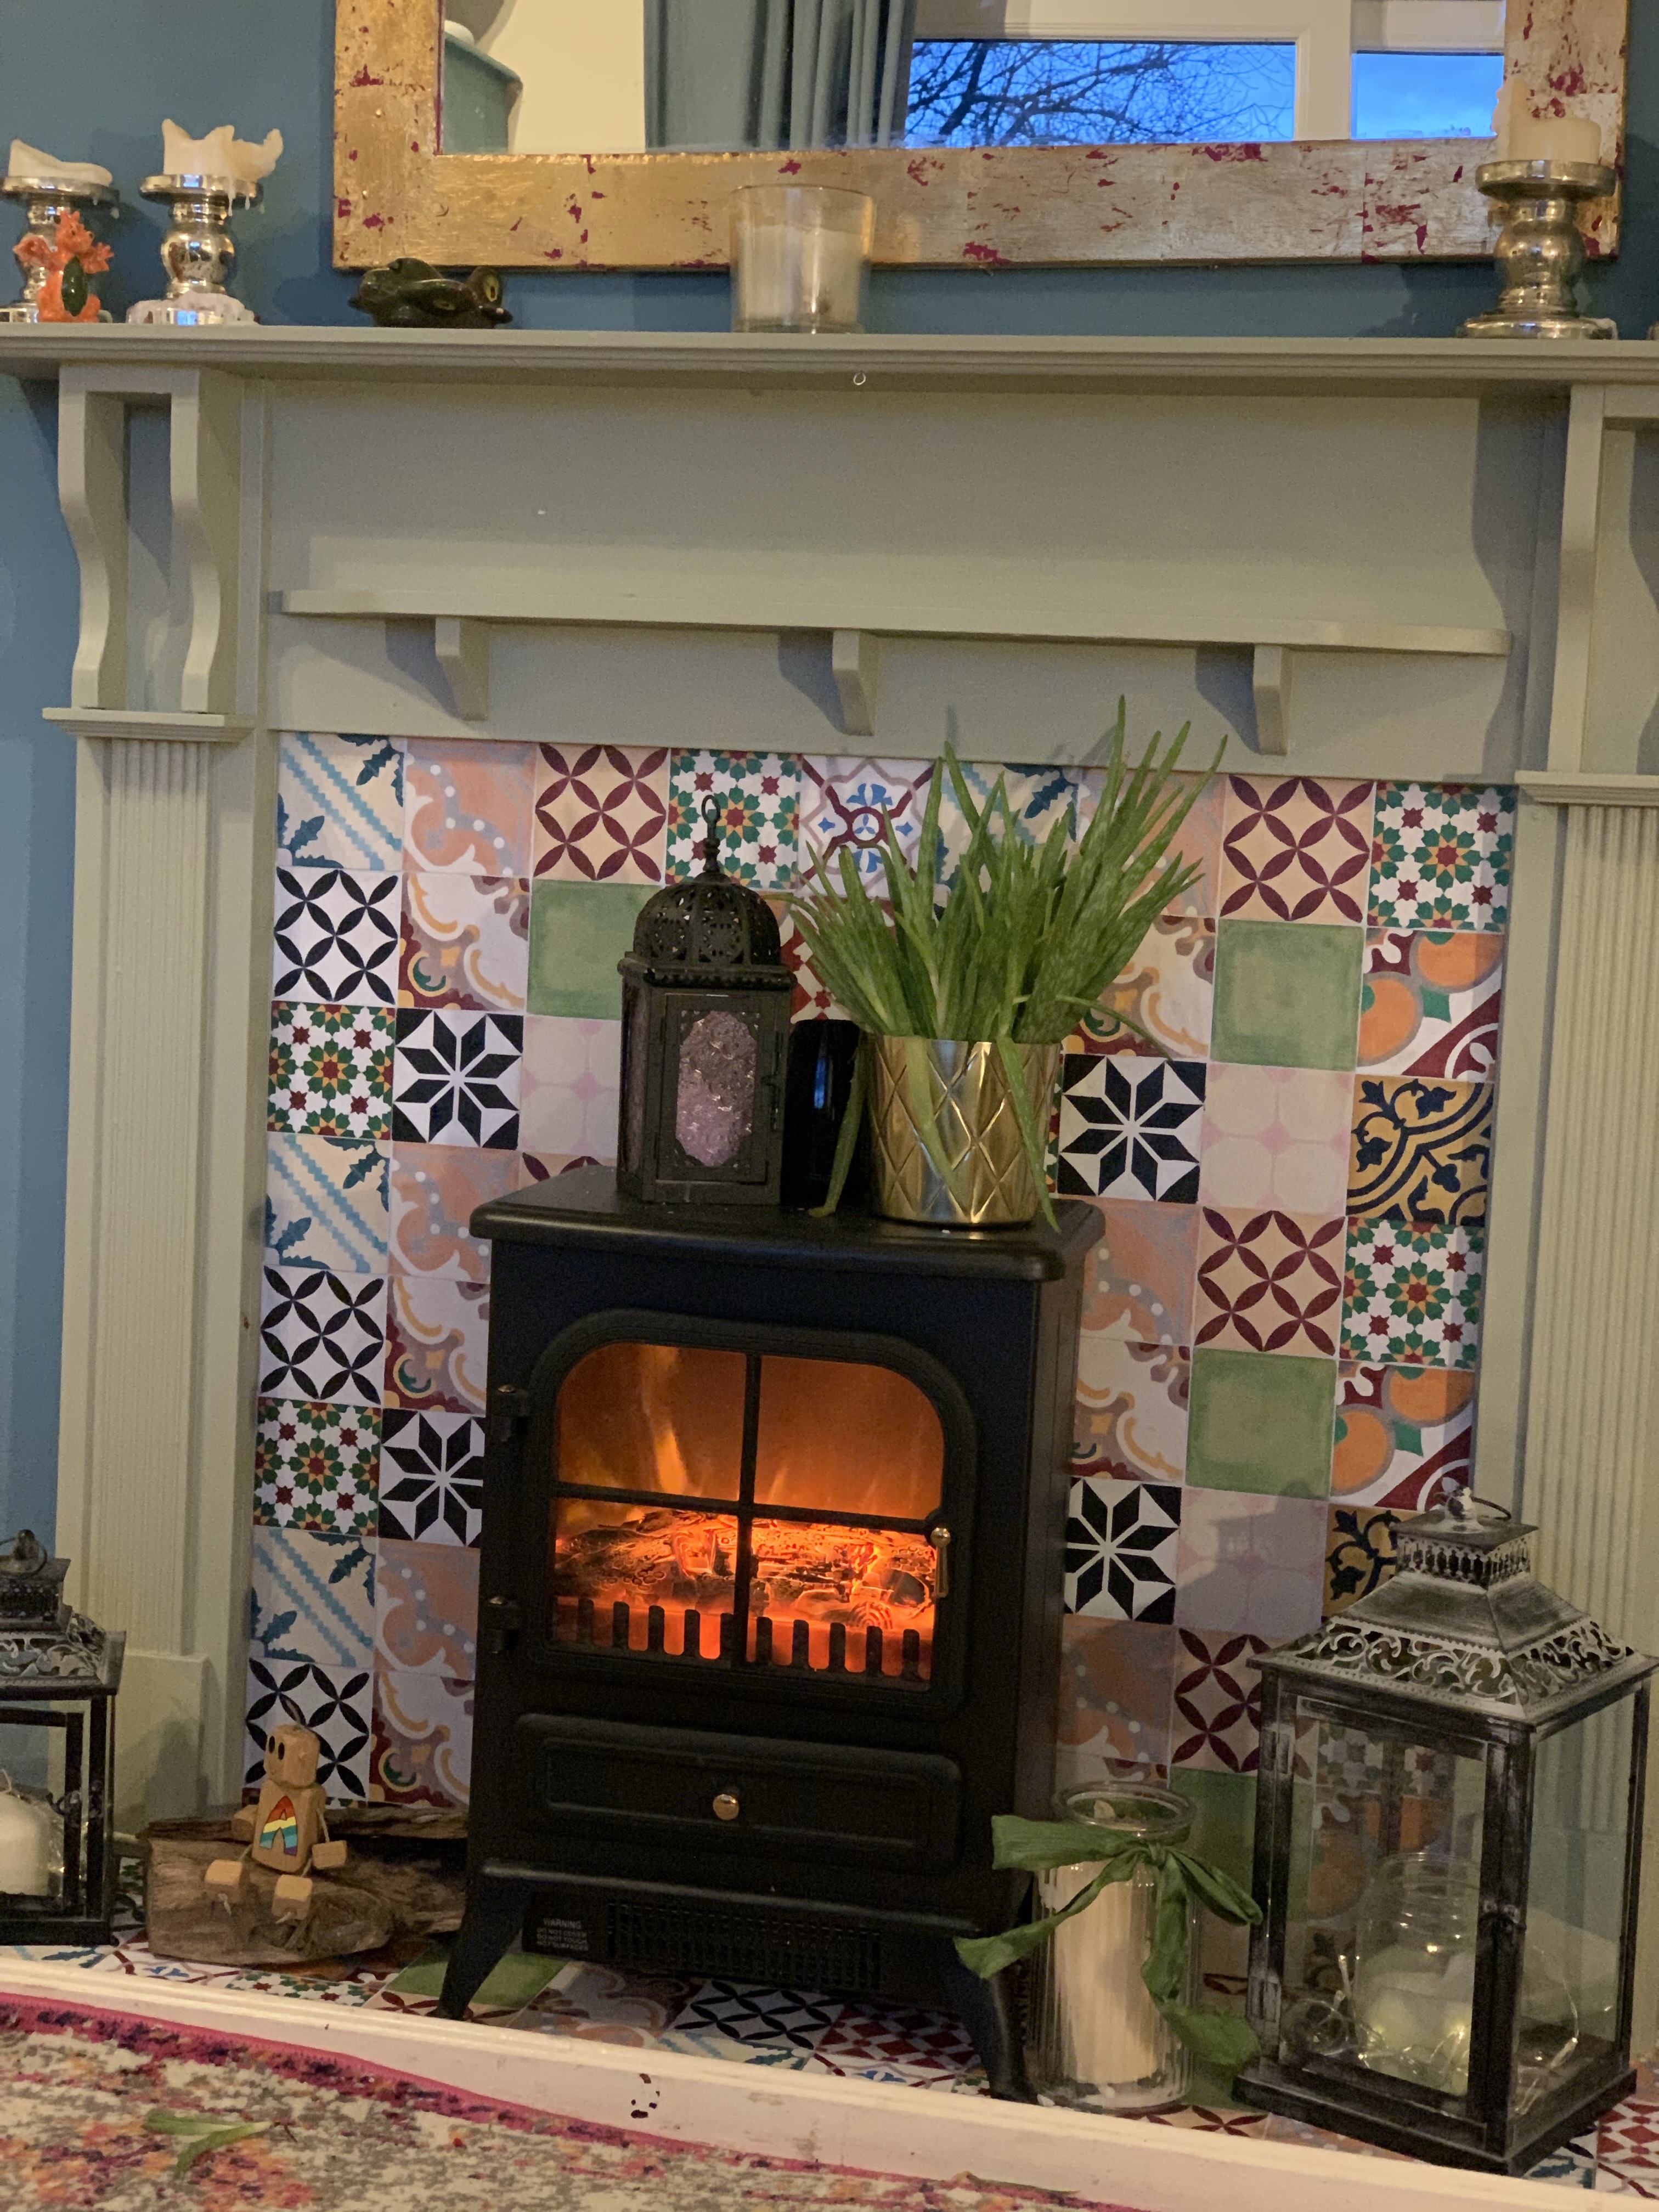
The overall finish and appearance is of high quality, there’s no pixelation or image distortion and as such it gives the appearance of ceramic tiles and this is exactly what I was looking for. I’ve got all sorts of projects in mind for the rest of my house and now I’ve got my eyes on some of the more eclectic prints from the range – Dalmatian print next I think – check out the complete Restowrap vinyl range from http://wallpapermural.com
Last Updated on 2 years by Lavania Oluban